How to screenshot on laptop easily and smartly. Most also call it the SS way on a laptop. Here we will discuss how to do it on windows laptops and Macbooks.
A screenshot is an image capture of what is generated from the screen display on our laptop. Every laptop or mobile phone should have a feature to capture / take pictures on the screen. This feature has been provided in every Operating system (Windows, MacOS and Android).
That way, of course, this method can function on various kinds of laptops, from asus, acer, lenovo, cellphones to local brands like Axioo though.
If you forget or don’t know, here are various ways to screenshot on a laptop.
How to screenshot with Snipping Tool
The Windows operating system by default is equipped with screenshot tools, one of which is Snipping Tool. This tool has been around since Windows Vista (2007), and is still available in windows 7, windows 10, windows 11 and later. It’s just that there is a slight difference in appearance.
Here’s how to use the Snipping Tool to take screenshots.

- Open the Snipping Tool Application first, you can search / type it in the start menu,
- You select the New menu,
- Then your Laptop screen will change to shooting mode,
- Click, hold and drag the part of the screen you want to capture, then release your click.
- Your image is ready to be edited in the paint application,
- If you have clicked the Save icon (or press ctrl + S together),
- Place the Image into your folder storage.
It’s very easy, oh yes there are 4 shooting modes provided from the Snipping Tool tool, namely Rectangular, Window, Fullscreen, and Freeform.
How to Screenshot with Windows + Prt Sc
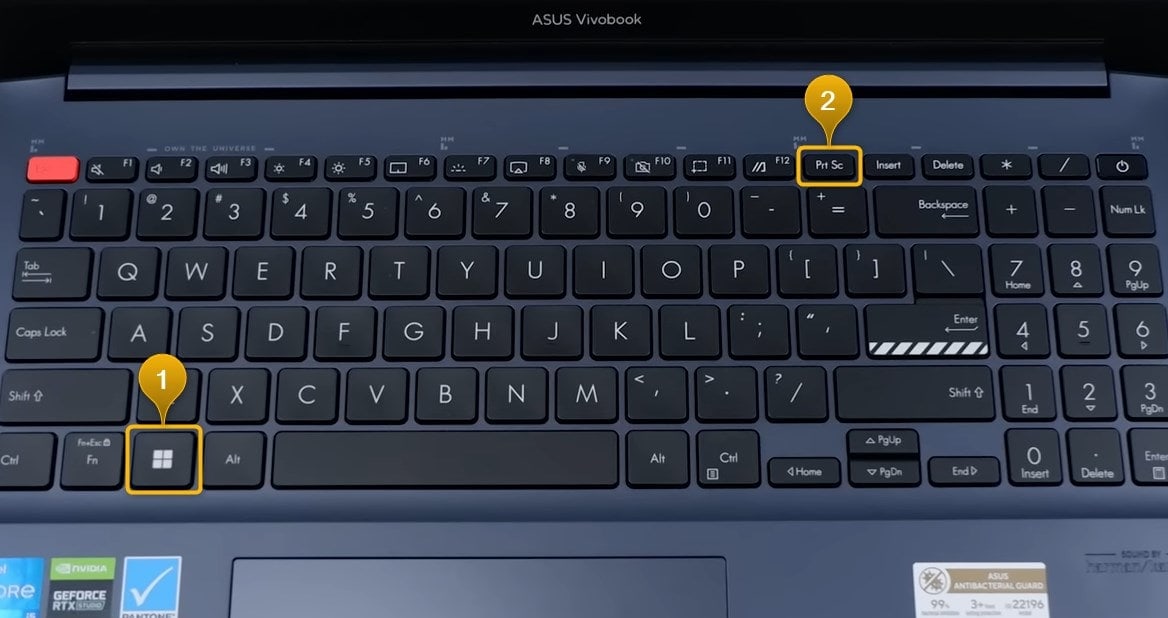
This is a keyboard key combination shortcut to take screenshots on laptops and PCs. This method is practical because it is done very quickly, just pressing two buttons.
But to screenshot using the keyboard you need to know the keys, namely the Windows logo and Prt Sc. This key was originally named Print Screen, sometimes on the keyboard written with “Prt Sc”, “PrtScn”, “PrntScrn”, or “Print Scr” which is located at the very top right.
- Make sure your screen is ready for screenshots.
- Press Windows key + Prt Sc (sequentially and simultaneously)
- The monitor screen will flash, and automatically the entire screen will be screenshotted and stored in the Laptop computer.
Where is the screenshot folder located?
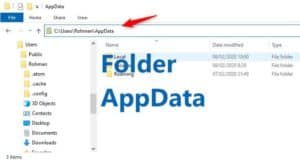
You can find the screenshot results in the Pictures > Screenshots folder. More specifically, you can find it on the C:\Users\[Your PC Name]\Pictures\Screenshots drive.
Copy a screenshot image in Windows
You can copy the screenshot directly from the screen and put it in the application by pasting the image, this is like you copy and paste the image into the application. This method is very practical, here’s how:
- Press the Prt Sc key on the keyboard just once.
- You can paste the image into the application.
The screenshot is a full image of the entire screen. But for Windows 11 and latest users, you can choose which part of the screen you want to screenshot.
How to Screenshot Apps with ALT+Prt Sc Keys
If the above method copies the entire contents of the screen, well this time how to take a focus screenshot in certain applications only, so that other applications and the bottom taskbar are not included.
- You open the App you want to screenshot,
- Make sure the App is displayed on the screen and not covered by other apps,
- Press the ALT + Prt Sc keys at the same time,
- You paste the image into the editing application.
The results will be very precise for the application you choose only, the display on other parts of the screen will not be screenshotted.
For other Focus Screenshot App tricks you can see the ones below.
Screenshot using Windows key + G
Microsoft provides a special feature provided for gamers namely Game bar and there is also provided screenshot button. If you are playing games and want to capture certain scenes in the game, you can try the screenshot method this time,.
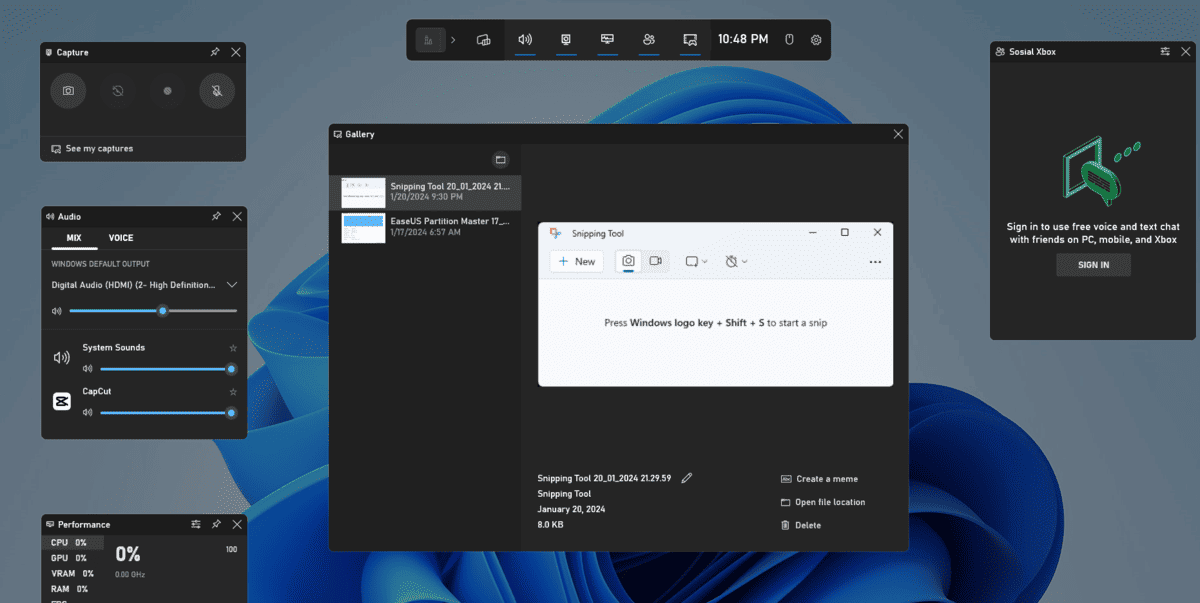
- You press Windows key + G, to open Game Bar mode
- In the Capture window, you click the camera icon
- A screenshot will be done and you can see the result directly through the Game Bar.
If you want to screenshot games faster, just press the key combination Windows + Alt + Prt Sc. You can also use this combination to Focus Screenshot the frontmost application on the laptop screen.
To preview the screenshots, you can open Game Bar mode.
Game Bar Screenshot Storage Location
Screenshots you take using the Game bar tool have their files stored in
C:\Users\[your pc name]\Videos\Captures
How to Screenshot on Detachable Laptop
How about a detachable laptop or windows tablet that does not have a keyboard.
In addition to using the snipping tool application as mentioned above. You can also do screenshots on tablets by pressing the power button which is then accompanied by pressing the volume down button, (power + volume down).
This method is the same as taking screenshots on Android phones.
The screenshot file will be automatically saved in the screenshots folder. You can search for it in the Pictures gallery folder.
Screenshots with third-party add-on apps
For those of you who often do screen screenshot work, it is more comfortable to use third-party applications, because most of them are equipped with additional features that are very useful. With third-party apps, you’ll be given the convenience of managing multiple screenshot images.
Many screenshot applications are provided on the internet, ranging from FREE (usually there are only simple features added), to the paid version (which of course is given better excellent features).
Some good screenshot applications include Screenpresso, Snagit, PicPick, Lightshot, Greenshot, ShareX, and Snagit.
How to Screenshot on MacBook
What if we use a laptop from Apple or MacBook? Surely, you know that MacBooks run with the MacOS operating system, in contrast to Windows. Therefore, there is a special method that needs to be applied to screenshot on this Apple laptop.
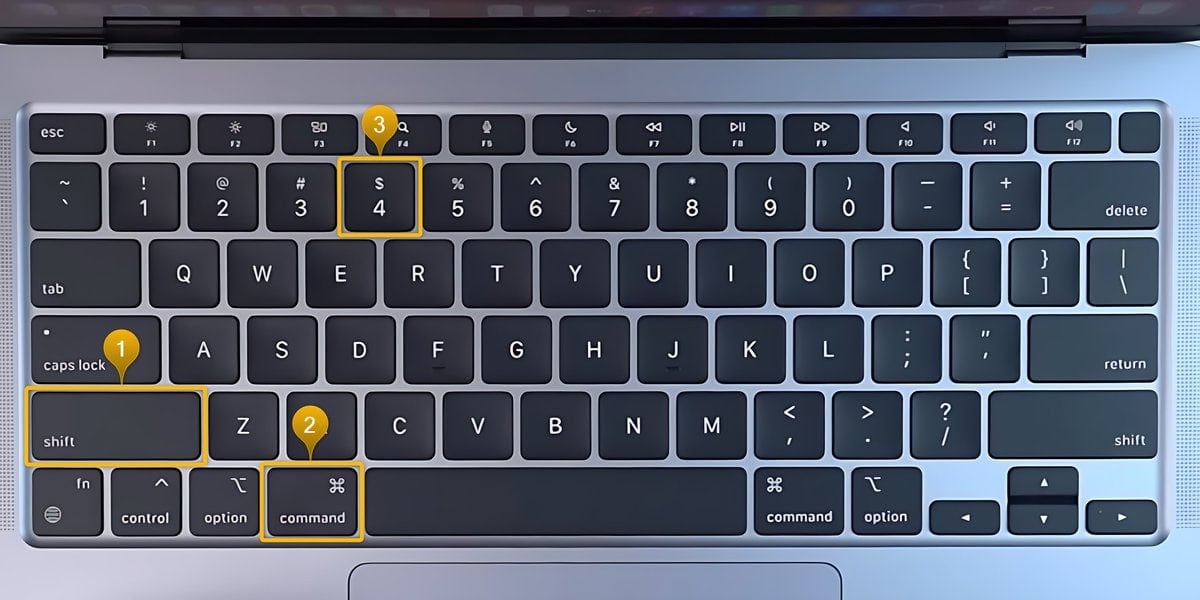
Here are four ways to screenshot on Apple’s MacBook laptop. Everything has the same way it works, only the difference is which part will be screenshotted.
1. Screenshot all screens on MacBook
- You prepare which part you screenshot,
- Press the Shift + Command + 3 keys on your Macbook keyboard at the same time,
- You will see a thumbnail preview in the corner of the screen, Click to edit it or leave it alone and the screenshot will be saved automatically on the Desktop (home page).
2. Screenshot in a specific section on MacBook
- Press the Shift + Command + 3 keys,
- You are told to select the part of the screen to be screenshotted, click the selection using the mouse.
- If you want to drag what you selected press space and hold, then move it while sliding your mouse.
- Release the mouse to take and save the screenshot.
3. Screenshot in a specific window (application)
- Open the app you’re going to screenshot, make sure it’s at the very front.
- Press and hold the Shift + Command + 4 + SPACEBAR keys at the same time.
- The screenshot will be focused on the application window you opened earlier.
4. Screenshot with tools from the latest MacOS
If your MacBook is using macOS Mojave or later, there’s a very versatile screenshot app.
- To open it you can press the Shift + Command + 5 keys simultaneously.
- Later the tool will appear on the screen, which consists of having 5 features / modes, namely capture the entire screen, capture a certain window, capture part of the screen, then record the entire screen and record part of the screen to take in the form of video.
- Select the screenshot mode you want.
Once you’ve taken a screenshot of the small thumbnail in the corner, you can drag it to save the file, click and drag the thumbnail to a folder to save it to that folder, or click the thumbnail to edit the result first.
Where the screenshot is saved (Windows Laptop)
You can find it in the Pictures gallery of the screenshot folder, precisely at:
C:\Users\[Your PC Name]\Pictures\Screenshots.
If not try searching in:
C:\Users\[Your PC Name]\OneDrive\Pictures\Screenshots
The following is the screenshot location if using the Game bar:
C:\Users\[your PC name]\Videos\Captures
Where screenshots are saved (Apple Laptops)
On the MacOS system, the screenshot results will automatically be saved on the desktop.
Laptop Screenshot Key Shortcut (Print Screen)
On windows keyboards this key is also labeled with the name “Prt Sc”, “PrtScn”, “PrntScrn”, or “Print Scr”. With certain key combinations you can do with different shapes.
